TeamGenius allows you to import players either by using your registration data in SportsEngine or TeamSnap or using your own spreadsheet (aka CSV file).
This article will walk you through the steps of how to upload a CSV file. For this process to work you will need to have the players first name and last name is separate columns. Here's a quick article showing you how to do this if players first and last names are currently combined in one column. First Name Last Name help
Note: If your file is currently in Excel, it needs to be converted to a CSV file. Here is a quick article showing you how to do that: Export Excel sheet as a CSV file
Importing Players With a CSV File
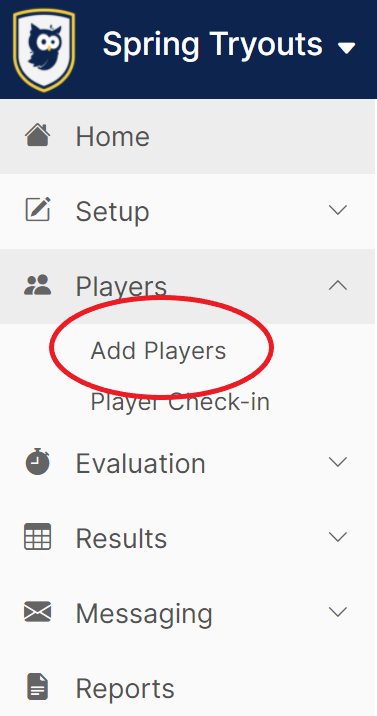
1. To import a file using a Comma Separated Values (CSV) file you will first need to click on "Add Players" under the "Players" tab on the left side of your assessment menu.
2. Click on "Add Players from a CSV file." 
3. Click "Select a CSV file" to find the file on your computer or drag and drop the file from your desktop to "Drop file here" just to the left.

The next window will show a preview of your CSV file. If everything looks good click on the "Continue" button.

Please note that there are two mandatory fields that you must have in your CSV file:
- Last Name
- First Name
The rest of the fields are optional:
- DOB
- Gender
- Phone
- Position
- Guardian First Name
- Guardian Last Name
- Player Pool
- Player #
- Eval Group (if this option was selected in your assessment set up.)
4. Once a CSV file is selected, you need to map your fields in the software. Please remember that your file must contain: Last Name and First Name.
Note: If you want to include more than one email per player, we've got you covered! You can choose the email mapping field for multiple email columns in your CSV file!
You may discover during this process you want to capture additional information about your players (ex. School attending or secondary position). You can create a custom player field on the fly by clicking on "+ Add Custom Field" in the lower right hand corner or under the mapping selection for the column.

See Setting Up Customer Player Fields for more details.
5. If your CSV file contains column headers in the first row, check the “Ignore First Row” to tell the import engine to ignore that data. Once all the mappings are complete click on "Use These Mappings" to post the file to the database.

6. If you are not alerted to any errors, click on "Save Players".

7. The system will inform you of how many players were imported successfully and how many may not have been mapped correctly at this time.

8. If you have more players to import from another file, you can now import more players by clicking on the "Import More Players" button. Please remember to ensure that all fields are the same as the previously imported file and meet the minimum required fields listed above.
Troubleshooting
If you receive a message on the Review and Save page stating you have Warnings on players, you will see a yellow exclamation next to the player's who have issues. Click on the exclamation icon to view the error.
